
Carts, discounts, fees and held sales
Change prices, give discounts, add fees and park a sale while you serve the next customer.
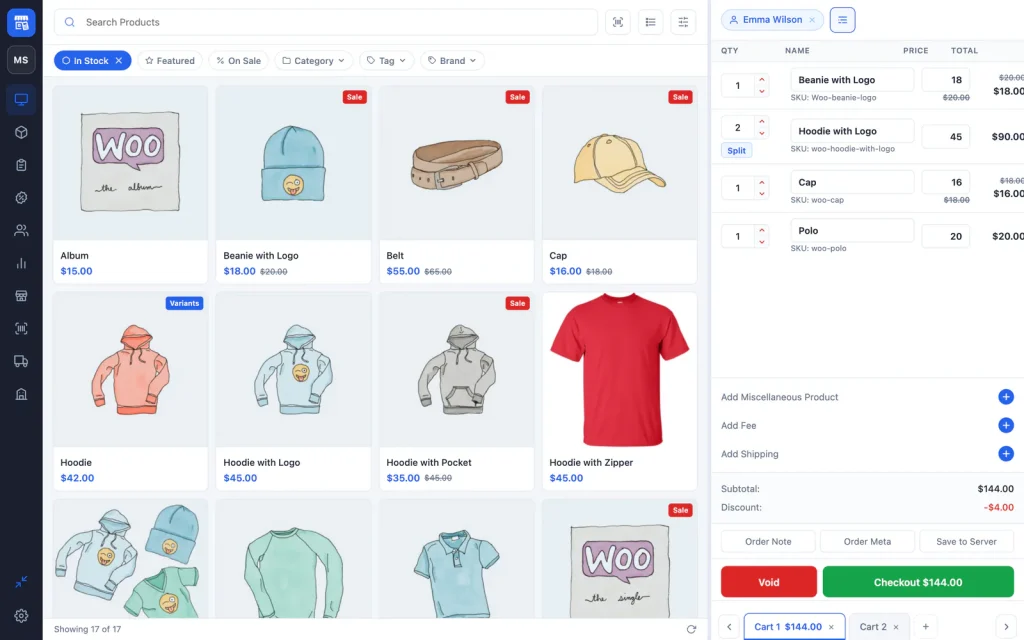
The choPOS cart lets you change quantities and prices, give 5 to 20 percent discounts from the price keypad, add fees and shipping, and attach a customer. You can keep several carts open in tabs, so a cashier can park one sale, serve the next customer and come back. Unpaid carts are saved as “POS – Open” orders.
Change quantities
Use the up and down arrows next to a line, or click the quantity and type. Clicking the quantity also opens a number pad for touch screens. When a line has more than one item, a Split button appears; it breaks the line into separate lines of one, so you can price or rename each one differently.
Change a price or give a discount
- Click the price on a cart line. A keypad opens.
- Type a new price, or tap 5%, 10%, 15% or 20% to take that percentage off the product’s regular price.
- Click Done.
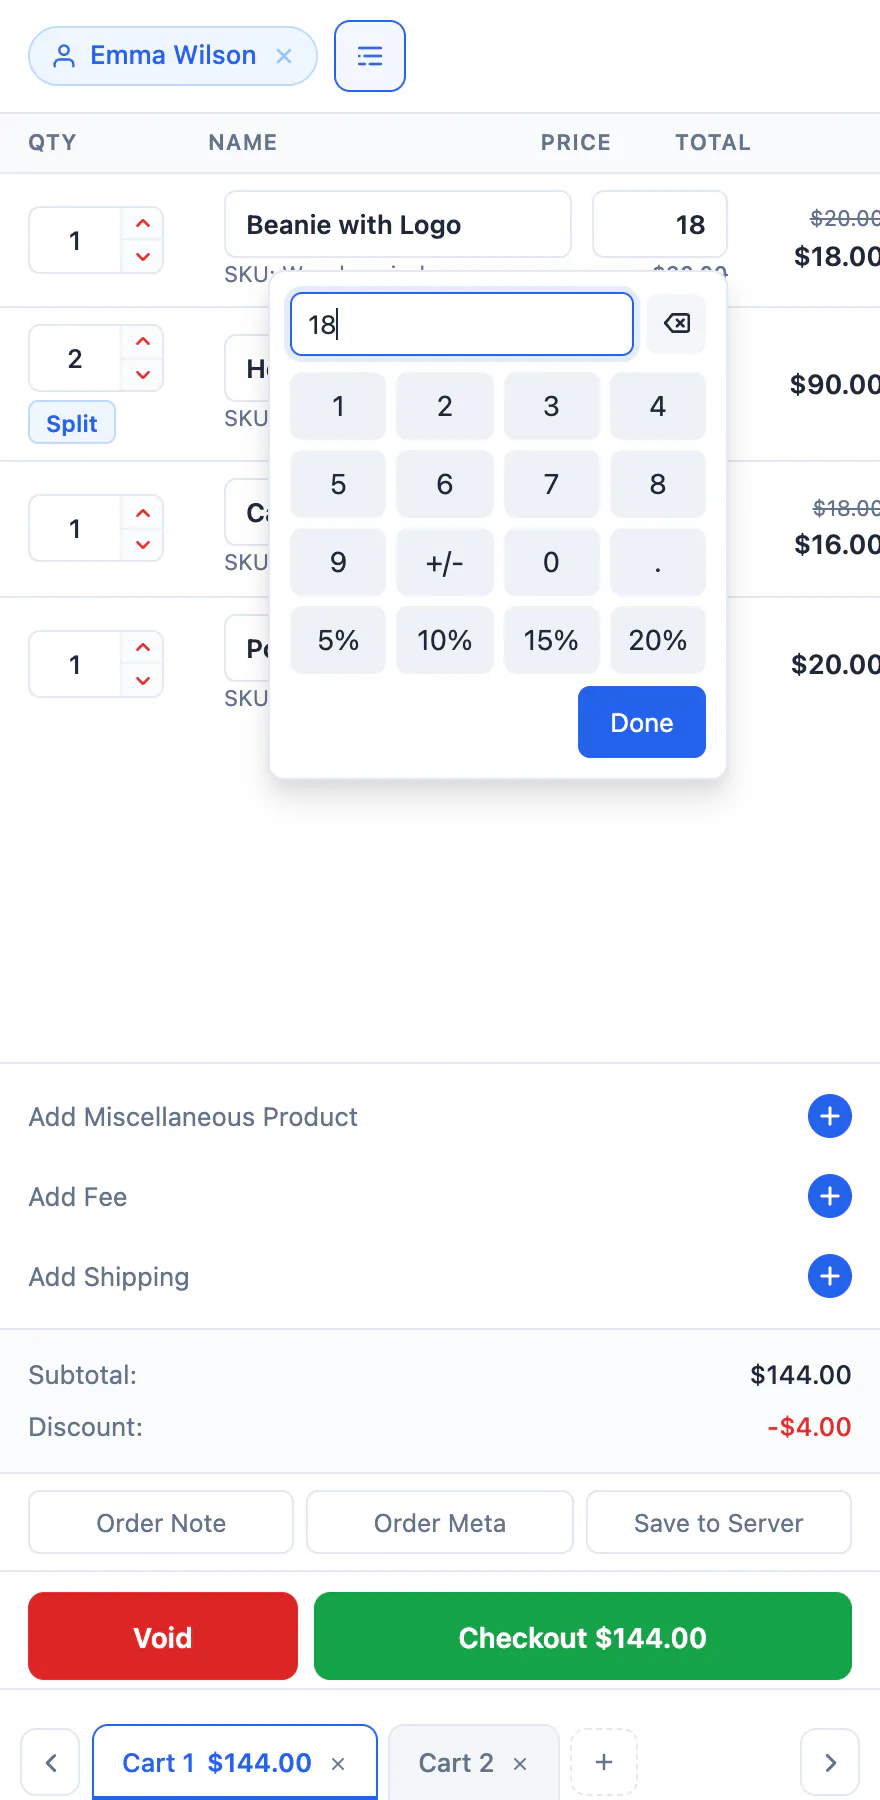
The cart shows a Discount row with the total taken off regular prices. To use a WooCommerce coupon instead, enter it at checkout, and manage your codes on the Coupons screen.
Rename or edit a line
Click the product name on a line to rename it for this sale; press Enter to keep the change or Esc to undo it. The ⋯ menu on each line has Edit Item and Remove.
Add a fee
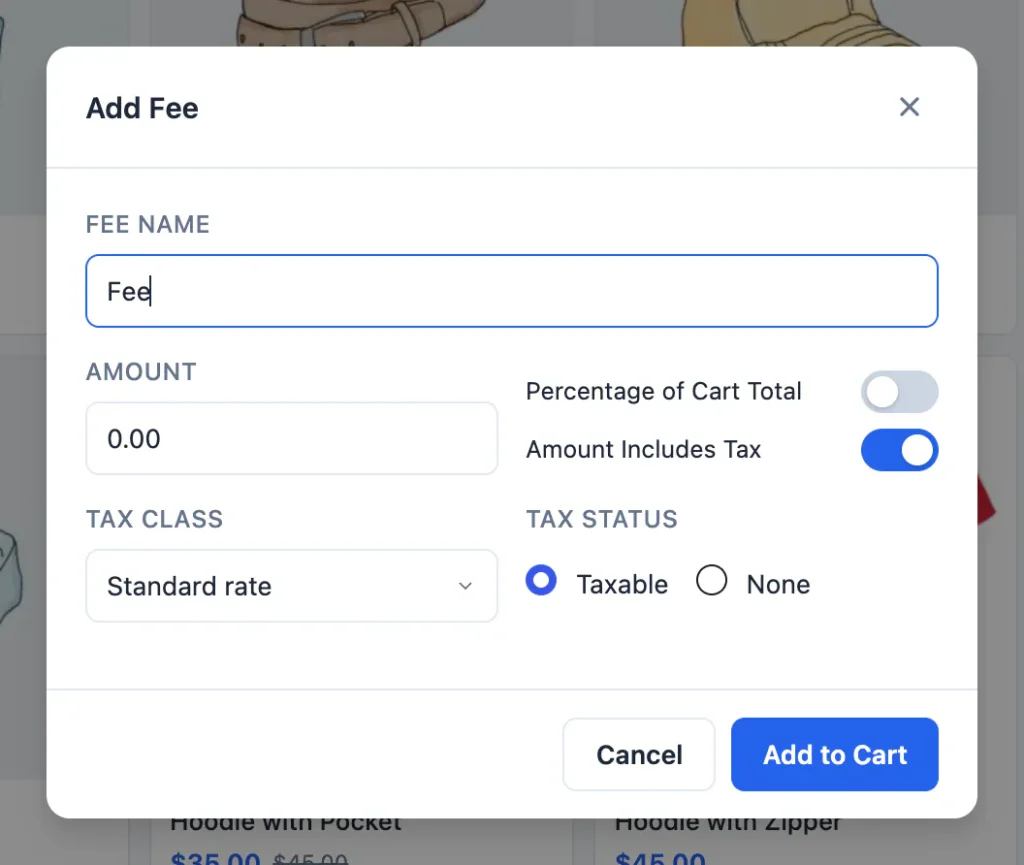
Click Add Fee under the cart. Enter a Fee Name, such as “Gift wrapping” or “Card surcharge”, and an Amount. Turn on Percentage of Cart Total to charge a percentage instead of a fixed amount. Choose whether the amount includes tax and which tax class applies, then click Add to Cart.
Add shipping
When you post an in-store purchase to the customer, click Add Shipping. Enter a title, pick the WooCommerce shipping method type, type the amount and set the tax options. The amount is entered by hand; choPOS does not look up shipping zone rates.
Attach a customer
Click Guest at the top of the cart and type at least two letters to search customers by name, username or email. To remove the customer, click the × on their badge.
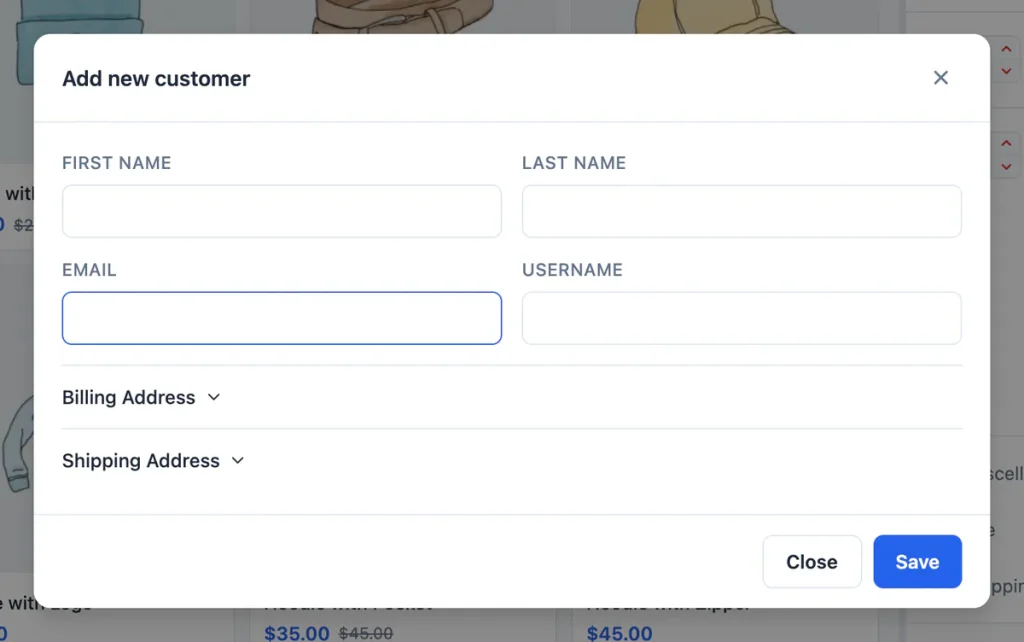
To create a customer, choose Add New Customer. Enter first name, last name and email (required). Billing and shipping addresses are optional. choPOS creates a normal WooCommerce customer account.
Serving one regular customer all day, or recording staff purchases? Set a Default Customer in Settings → General and it is chosen for every new cart.
Keep several carts open
The tabs at the bottom of the cart hold separate sales. Click + (New Cart) to start another, click a tab to switch, and use the arrows when you have more tabs than fit. A tab shows its total once it has items.
Each cart with items is saved on your site as a WooCommerce order with the status POS – Open about a second after each change. Open orders do not reduce stock and are left out of WooCommerce Analytics. When you check out, choPOS turns that same order into the completed sale. Empty or close the cart and its open order is removed.
To clear a cart, click Void and confirm. To close a tab, click its ×.
Cart settings
The menu button at the top right of the cart opens Cart Settings. Choose which columns the cart shows, drag them into a different order, and decide whether the receipt is shown or printed automatically after checkout. These settings are saved on the device.