
Make your first sale with choPOS
A complete sale from empty cart to printed receipt, in about five minutes.
To make a sale in choPOS, open choPOS → POS Terminal, tap products to add them to the cart, optionally pick a customer, click Checkout, choose the payment method, enter the cash tendered and click Process Payment. choPOS saves a completed WooCommerce order, reduces stock and opens the receipt.
This walkthrough assumes you have installed choPOS and checked your settings.
1. Add products to the cart
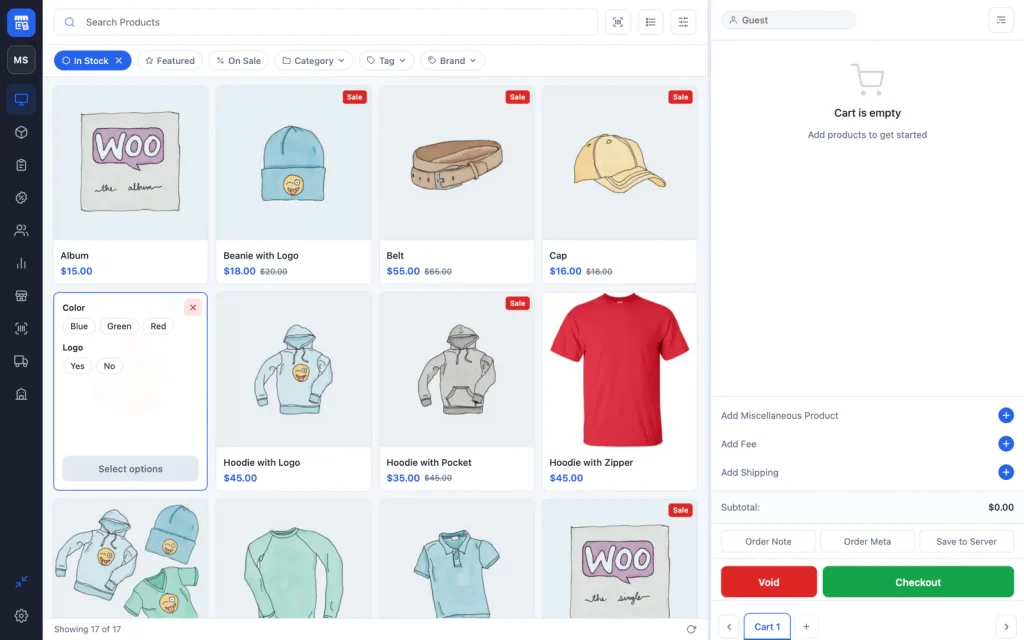
Tap a product tile to add one to the cart. Tap it again to add another. Use the Search Products box or the filter chips to find items quickly, or scan the barcode with a barcode scanner.
Products with a Variants badge are variable products. Tapping one opens its options on the tile; pick them and click Add to Cart.
2. Check the cart
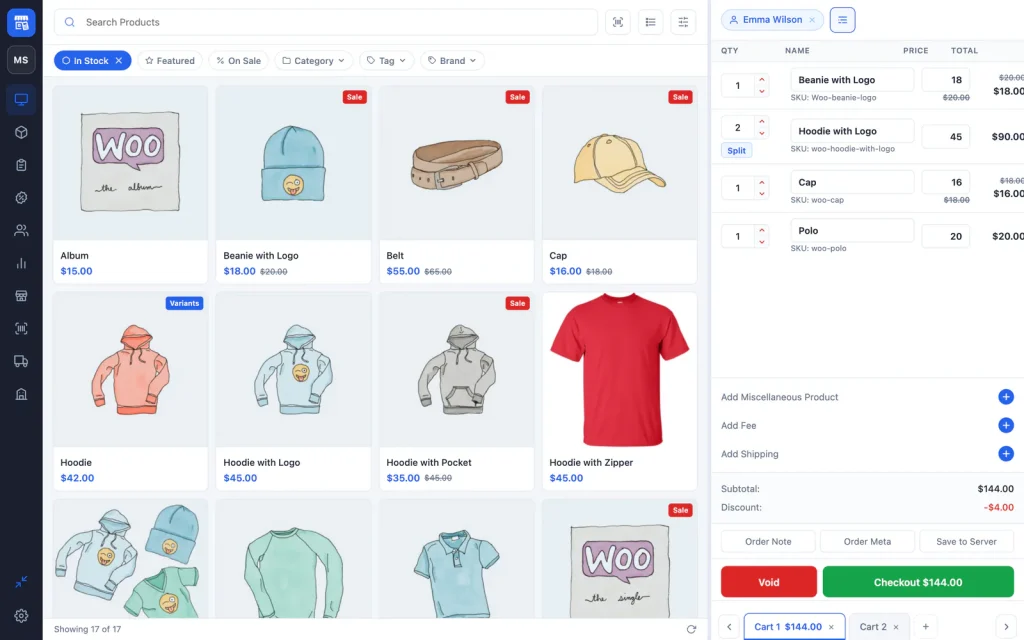
The cart lists each line with its quantity, price and total. You can change the quantity with the arrows, tap a price to open the keypad, or remove a line with the ×. Discounts, fees and shipping are covered in Carts and discounts.
3. Attach a customer (optional)
Carts start as Guest. To put the sale on a customer’s account, click Guest at the top of the cart and type at least two letters of their name or email. To add someone new, choose Add New Customer.
4. Take payment
- Click the green Checkout button. The Checkout Order window shows the items, totals and Amount to Pay.
- Choose how the customer is paying: Cash, Card, or one of your enabled WooCommerce payment methods.
- For cash, type the amount the customer hands you in Amount Tendered. choPOS shows the Change to give back.
- Click Process Payment.
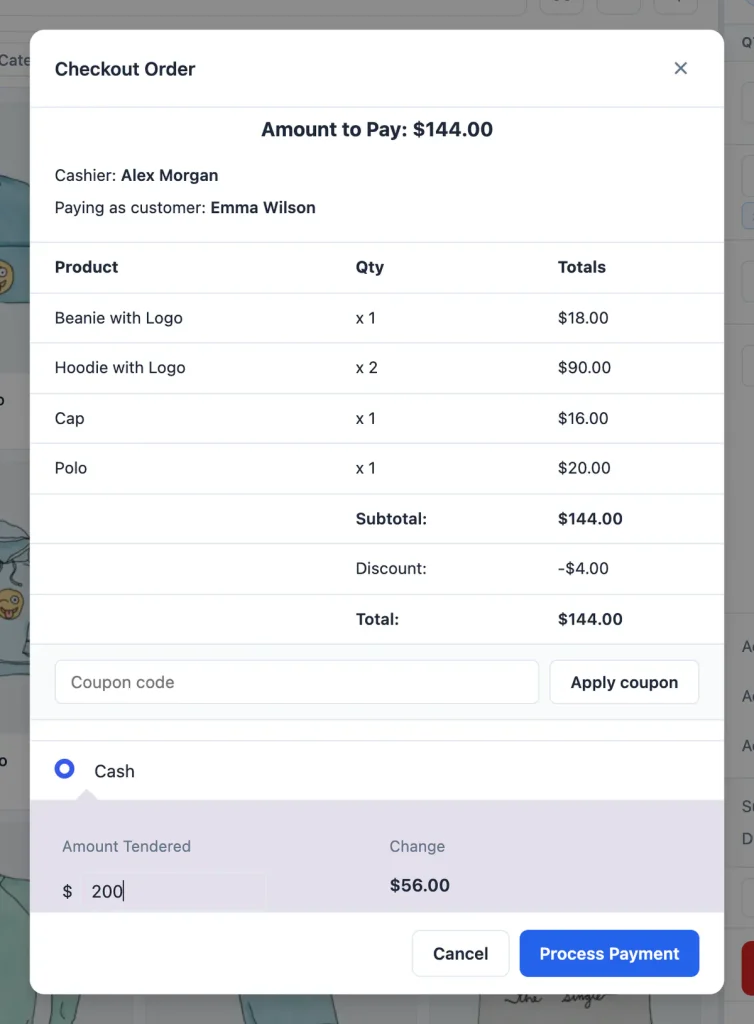
Taking a deposit instead? Enter less than the total and the button changes to Take Partial Payment. See Checkout and payments.
5. Print or email the receipt
After payment the cart clears and the receipt preview opens. Click Print Receipt, Email Receipt or Download PDF. You can change what happens after checkout in Receipts and printing.
What choPOS saved
The sale is now a completed WooCommerce order. It records the cashier, the payment method, the cash tendered and the change. Stock for each product is reduced in WooCommerce, so your online shop shows the same stock as the counter. Find the order any time on the Orders screen.